Cured Egg Yolks

0

So, I’ve decided to conquer the yardbird. It seems I tend to tackle certain foods or techniques every season. Three was the season of shortribs and braising (and waist expansion). The season of learning how to master my smoker. The season of soups. The season of the barbecue. I really tend to avoid chicken. It is just so much work. And I usually love the skin or sauce more than the actual chicken. But I’ve decided I will conquer that yardbird (Yaahdburhd if you’re into the correct southern pronunciation)! To get going, but not ruin my day, I decided to start where the chicken started…the egg. Don’t worry, I’ll move on to the whole chicken later, but we’re starting with something I already love. Now that we know why we’re tackling this egg, why cure it? Salt. Fat. Umami. Fun. Need I say more? And hey, if the Zombie Apocalypse hits, you’ll still be able to eat like a king!

Don’t go thinking I’m some kind of culinary genius. Salted, cured egg yolks have existed for a long time in the form of Bottarga. Bottarga is salt cured fish roe sacs. Don’t worry a bit, with shad roe season starting here, we’ll be making some of that too! I digress. Salted hen yolks have a slightly salty, fatty, magical flavor. They’re quick and easy to make and can totally transform pasta, salads, and soup. Just use a fine grater or micro planer to give your dishes a little dusting. I’m practically drooling thinking of a yukon gratin with sage and a little dusting of cured egg yolk.

To kick off your cured egg yolk addiction:

  • 1 container, about 2 inches high, 8 inches long, and 6 inches wide
  • 2 cups of Kosher salt
  • 2 cups of sugar
  • 4 egg yolks (freeze the whites in ice cube trays for later use, make a little Angel food cake, or make some cloud bread)

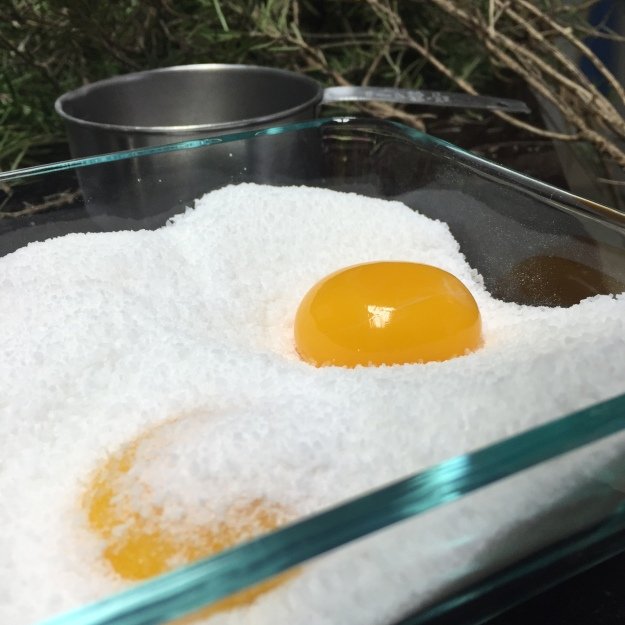
Thoroughly mix your salt and sugar and place a decent layer in the bottom of your container. Make four little nests in your mixture with the back of a spoon. Separate the whites and yolks. Place each yolk in its nest.
IMG_3288

Just look at that little golden globe of goodness!

Gently cover with the rest of the salt-sugar mixture. Place your lid and tuck into your fridge. Let sit for 1 week. After the week has passed, gently remove the yolks from your mixture. They will be slightly translucent and the firmness of a dried apricot.
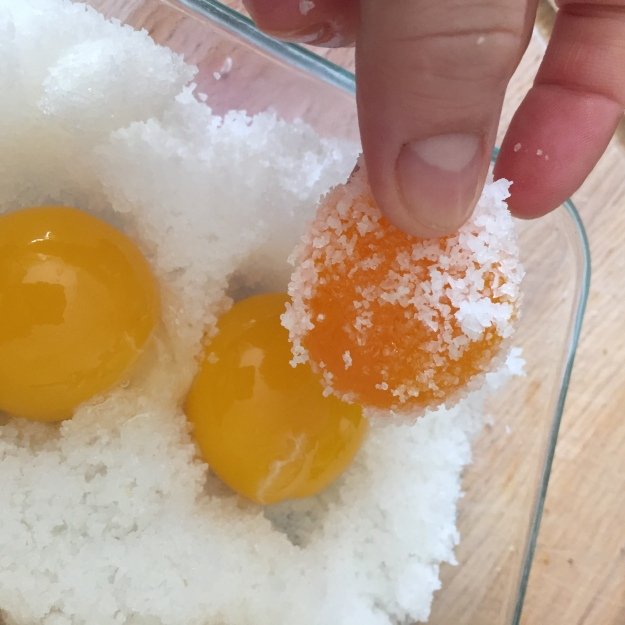
IMG_3435

You can see the difference between fresh egg yolks going down for a little salt slumber and those that I’ve just dug out of their cozy cocoon.
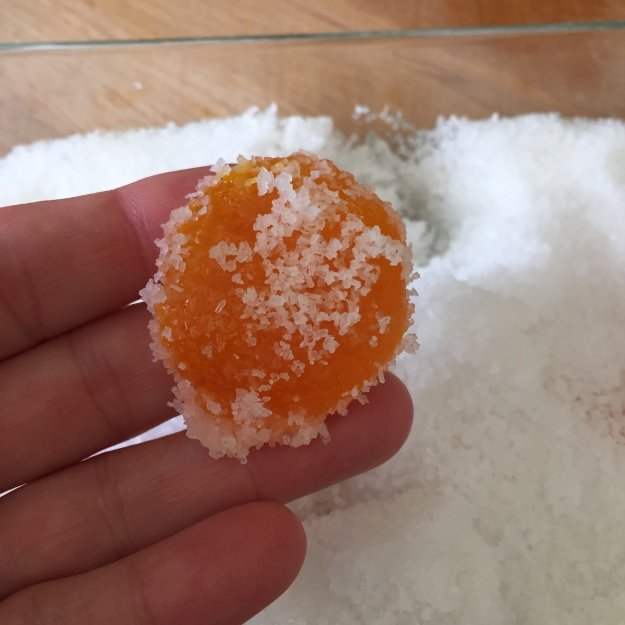
IMG_3434

These little gems are like adult salty jelly beans!

Rinse in cold water and pat dry with paper towels.
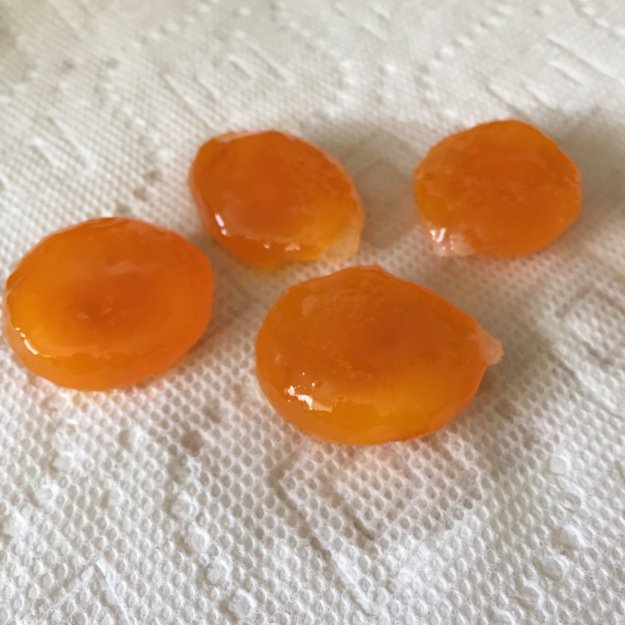
IMG_3437

Don’t be afraid of the cold water rinse. It’ll get rid of excess salt and the yolks won’t melt.
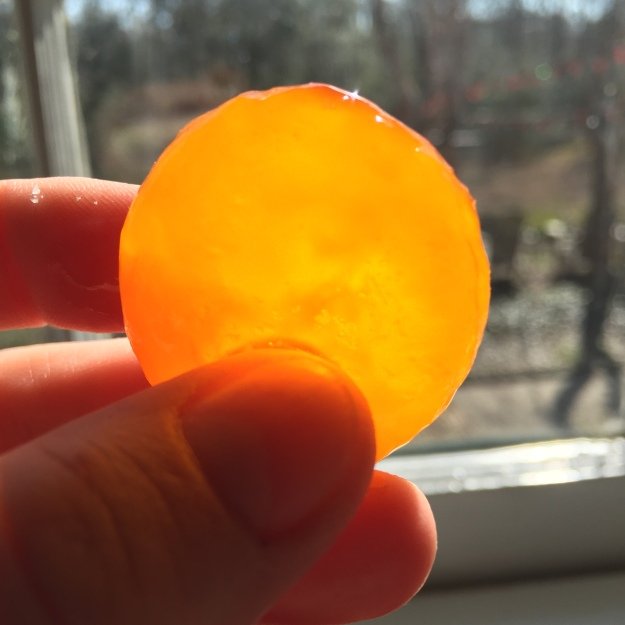
IMG_3439

Good morning sunshine!

Place in a dehydrator set at 145 degrees. Dehydrate for 3 hours or until firm.The yolks will continue to firm up as they cool. Grate, grate, grate away! They’ll last a month in a sealed container in the fridge, but I guarantee they won’t stick around that long!
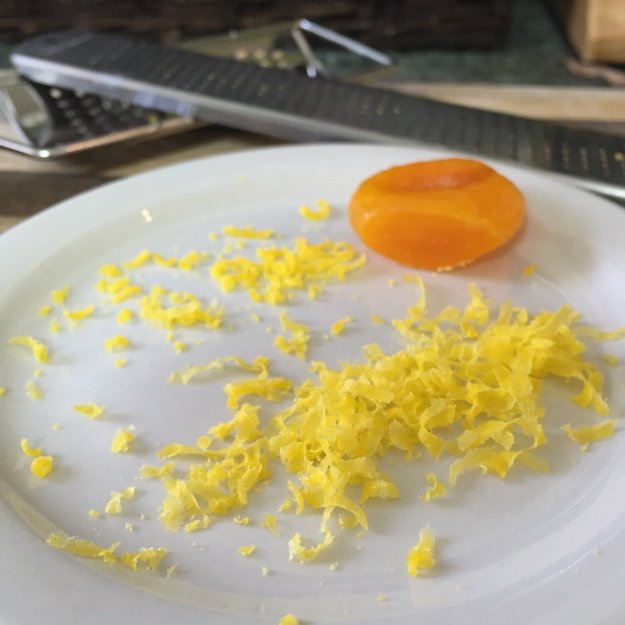
IMG_3445

Serious goodness. I prefer the uber thin tendrils produced by a micro planer, but the slightly more dense shavings produced by a grater work well too and may stand up to robust dishes a little better. Either way, just get that goodness on there!
 

Pickled Collard Stems

0

Pickled collard stems. “What the h-e-double hockey sticks is that?” probably comes to mind first, quickly followed by “How does one go about pickling said collard stem?”. Luckily I’ve trudged ahead through trial and error and therefore, have those answers for you. These little pickled delights can be addicting. They can be substituted for celery in a Bloody Mary, used to scoop up some jalapeno pimento cheese, or even chopped up and used in place of relish. You can pickle them whole or slice them on the bias. Even better news? They’re made from a part of the collard you normally pitch. Now that’s my kind o’ recycling. Let’s get to it.

Pickled Collard Stems

1 gallon glass container with lid
Stems from 2 bunches of collards, trimmed to 1 inch shorter than glass jar
1/2 onion, sliced thinly
6 cloves of garlic, peeled and smashed
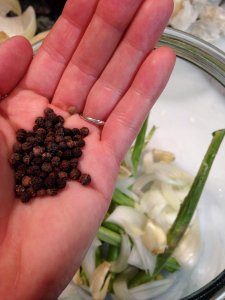
2 tsp whole black peppercorns
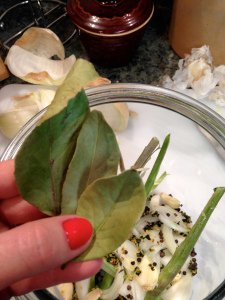
3 bay leaves

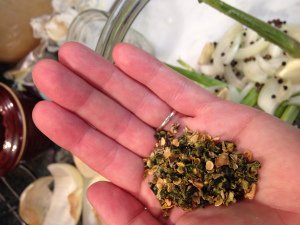
1 TBSP dried jalapenos (can use fresh)
1 gallon filtered water
3/4 cup pickling salt
1/2 cup apple cider vinegar

IMG_7505

Dried peppercorns

IMG_7506

Dried jalapenos (can use fresh)

IMG_7507

Bay leaves

Pack jar tightly with stems, onions, and spices. Bring water, salt, and vinegar to a low boil. Remove brine from heat and let cool for 15 minutes.

IMG_7508

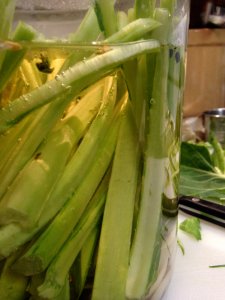
Submerging stems in brine with spices; Make sure everything is covered and place a fermentation weight or other heavy object on top to keep everything below the brine line (I have a bowl that fits just right!).

Pour brine over veggies, making sure brine covers everything. Place a fermentation weight (or a rigged up one like I do) over the top to prevent as much contact between the air and the brine surface. If you have a fermentation crock, bust that thing out and put it to use. Let your container sit at room temperature for 3-5 days, until your spears have the saltiness, flavor, and crunchiness you like.

IMG_7537

Let ’em sit until the have the taste, saltiness, and crunch you like (mine sat for 4 days)!

When they reach that point, trade your weight for a lid and place the whole container in the fridge. Your pickled stems will last several weeks (if you don’t gobble them up first!).

Sweet and Savory Bacon Jam

6
IMG_6924

One of my all time favorite ‘sammiches’ with Chevre, braised collards, ripe tomatoes, over-easy egg, and bacon jam. Good and messy!

Bacon…..Jam……Bacon. Jam. Bacon Jam! Yes, Bacon Jam. You heard me right. And yes, I’m drooling. I bet you are too. It’s a little sweet, a little salty, a little smoky, and a whole lotta magic. I’ve had several variations of bacon jam and there are an infinite number of recipes on the Interwebs. The variations are endless-some with brown sugar, espresso, or bourbon. Others with molasses, sorghum, or red chilies. Some include mustard or other spices. I’ve kept this one pretty simple so it can be used in a number of ways and the smoky bacon flavor stands out. It’s truly a thing to behold for bacon lovers. Your mind may want to have a slight spasm at the thought of bacon and sweets, but give it a go and I’m just about darn certain sure you’ll fall in love with it. Try it on fried eggs, BLTs, grilled cheese, or crostini. Or a spoon. Or sneak out into the kitchen in the dead of night, under the pretenses of needing water of course, and just stick your finger right in the jar!

  • 1 pound bacon, cooked crisp, and cut into thin strips, fat reserved
  • 2 sweet onions, sliced thinly, and caramelized
  • 2 cloves garlic, mashed, peeled, and minced
  • 1/2 cup brown sugar
  • 1/4 cup apple cider vinegar
  • 1 TBSP black strap molasses
  • 1/2 tsp crushed rosemary (so they don’t poke you in the mouth and ruin your jam experience)
  • 1/4 tsp lemon zest
  • Salt and cracked black pepper to taste
IMG_6891

Try cooking your bacon on a foil lined jelly roll sheet at 375 degrees on the middle rack. Flip once at about 10 or so minutes and then cook until crisp.

Caramelize your onions. This is a long and boring process, so get a beverage of choice and a stool or chair.

IMG_6848

Get your caramelized onions—they add great flavor to the jam and allow you to use less sugar than some other recipes.

After the onions are caramelized, add 1 TBSP bacon fat, garlic, the crumbled bacon, brown sugar, vinegar, and molasses.

IMG_6896

Add your ingredients and let it cook into a delightfully gooey mess!

Stir to melt sugar and cook on medium heat for 5 minutes. Add rosemary, lemon zest, and black pepper (mine didn’t need salt, but check yours as you go). Reduce to a low simmer and let it rip until it’s thick and gooey and coats the back of a spoon. For Pete’s sake, try not to eat it immediately as this stuff is like molten lava and will wreak havoc on the inside of your mouth. You do want to be able to taste it later, so exercise your best restraint (or have your spouse, friend, or neighbor hold you back).

IMG_6897

Look at that! You just licked the screen didn’t you?

Let the BACON JAM-yes, I feel I must scream the phrase because everyone on Planet Earth should know about it-cool for about 10 minutes. Smooth it out a bit in a food processor or leave it good and chunky-it all depends on your preference or how you want to use the jam. Your bacon jam is good in the fridge for about a week, but good luck with it lasting that long!

IMG_6898

You can leave your bacon jam chunky or smooth it out a bit depending on your preference and what you decide to use the jam for (why everything, of course!).

IMG_6899

My goodness, would ya look at that!? Put your bacon jam in a ball jar and you can carry it with you everywhere you go! Just kidding…you can however, stuff it in the back of the fridge for ‘safe keeping’. Enjoy!

Now, go to town. Have fun. Love your bacon jam! Definitely play with your ingredients—maybe add some coffee, mustard, different herbs, maple syrup, or bourbon!

Caramelized Onions

4
IMG_6886

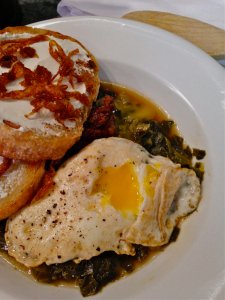
See those caramelized onions? Ok, so the egg and greens are a bit distracting…Go to the left of the egg, sitting right on top of the greens, nestled on top of the toast rounds/goat cheese…yep, there they are! Trust me, your taste buds will not miss these guys!

Look at that beautiful egg-check those out (and SO much more!) at Wishbone Heritage Farms. You won’t regret it!

Ok. I won’t lie to you. The process of caramelizing onions is a bit tedious. I mean, you have to cut up a ginormous amount of them, put ’em in a pan, stir them, give them more attention than I bestow on most folks, and waaaaiiiiitttt. BUT, they are so worth it. They’re like little candied onions. Tons of flavor and sweet. I almost can’t eat a pork loin without them. They’re great on a crostini with some goat cheese. Or you can mix them in with soups or try ’em with your creamy grits. My husband almost knocked me down one day when we were racing for the last bit of fluffy scrambled eggs with sautéed mushrooms, caramelized onions, and Muenster cheese. Luckily I practice my mental acuity games, thought on my feet, threw him a sharp elbow, and beat him to the pan. Then guilt kicked in and I shared. Dang conscience. Those caramelized onions would’ve been all mine! So, grab yourself a beverage of choice and a stool, park yourself in front of the stove, and make a huge batch so there’s enough to share and you don’t have to resort to childish shenanigans!

  • 6 Vidalia onions, thinly sliced and separated (any sweet onion will work; You can use others but may need to add a couple of pinches of sugar in the beginning)
  • 1/2 cup of water
  • 1 TBSP oil
  • Optional: 1/2 cup Marsala or Sherry wine (dry or sweet is your preference, depending on your intended use)

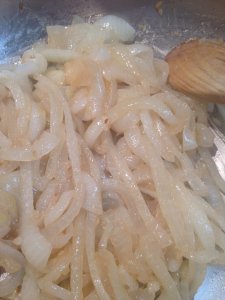
Heat 1 TBSP oil over medium heat in a pan large enough to accommodate your onions. Many will tell you that there should be a single layer, but I don’t have a pan the size of Texas and it still works. So, after the oil is hot, place in your onions and give them a toss to coat. If you’re using yellow or Spanish onions, add a couple of generous pinches of sugar here. Those onions have less natural sugar and can be harder to caramelize. Add the water to the pan and put on your lid (or some foil to capture steam). Let the onions steam a bit to soften up. Stir occasionally to avoid burning.

IMG_6819

Steam the onions a bit first to make their bulk a little more manageable. You’ll start with what seems like an insurmountable amount of onions and work your way down to a much smaller portion.

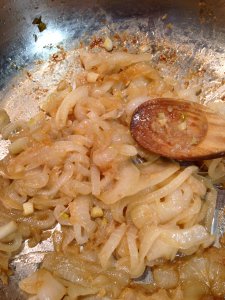
A golden brown or amber color on the edges is okay, black and charred is not tasty for this application. After the onions are a more manageable size (maybe 10 minutes or so), remove the cover. Remember that beverage and chair? Use them—this is gonna take a bit. Make sure the softened onions are in as much contact with the pan as possible if they can’t be in a single layer at this point.

IMG_6829

The onions are beginning to get their caramel on.

Every 5 minutes or so, check the color of the onions that are in contact with the pan by lifting up a few with a spatula. If they are that deep, golden brown (not burnt!), flip gently. Try not to break the onion skins when stirring or flipping as it can make the end result a bit stringy in my opinion. After flipping, get the onions situated in a single layer again, aaannndd wait. Keep checking and flipping as the color darkens. You’ll have to be more attentive as time progresses in order to avoid burning the onions. It can happen fast, so watch your heat and the time between flipping. For a big batch, the whole process can take around 40 minutes.

IMG_6847

This is about where I start wanting to pick at them because they smell so good! This is also the point where you can add flavorings like Marsala or Sherry or herbs like anise, rosemary, or black pepper. Try out herbs and flavorings that will complement your meal.

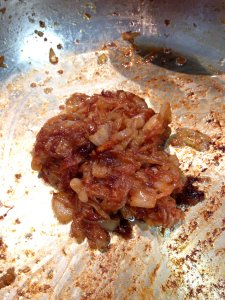
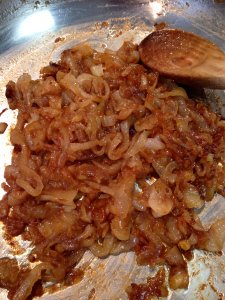
Depressingly, the vat of onions you started with condenses down, like the center of a black hole, to this super concentrated form of onion. They’re sweet and earthy and oniony at the same time. Never fear onion haters (Shane!), it’s not that sharp onion flavor, but much more mellow-like a grilled onion. These guys will keep in a sealed container in the fridge for a week or so-but I promise they won’t be around that long!

IMG_6848

Whew! You’re done! Delicious, flavorful caramelized onions. I promise you’ll start making up reasons to use these!!

Easy Fermented Pickles

2
fermented pickles

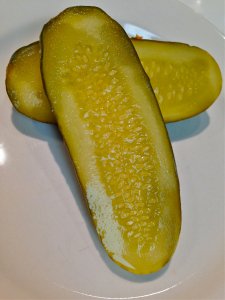
Super crunchy, zesty fermented pickles.

After experimenting with fermenting cabbage and producing a delicious sauerkraut, I turned my sights to fermented pickles. I can remember my Dad fermenting pickles from the garden in a huge Blue Crown crock. The fermented pickles always tasted so much better than heat-processed, canned pickles. The flavor of the spices stood out, the sourness was superior to that produced by vinegar alone, and they stayed crunchy. I read post after post and tried recipe after recipe and settled on something that combined the best of all of them. They really did turn out superbly-a little spicy, a little garlicky, and a whole lotta crunchy. No limp, squeaky, bland pickles here! Best news, unlike other ferments that take a month or two, this one took only 9 days to produce a fantastic pickle!

fermented pickles

Spicy, garlicky, and crunchy!

Fermented Pickles

  • 5 wide-mouthed quart jars, sterilized
  • 5 smaller jars (I use 4 ounce) jars, sterilized
  • Sterilized tongs
  • 5 rounds of parchment paper, cut to fit just inside of quart jars
  • 5 sections of cheesecloth and 5 lengths of twine to cover jars
  • 12 cups of filtered water
  • 1/2 cup plus 2 TBSP Kosher salt
  • 1/4 cup distilled white vinegar
  • 10 cloves garlic, peeled and smashed
  • 5 red chili peppers, diced
  • 5 bay leaves
  • 5 teaspoons dried dill
  • 5, 1/2 tsp loose green tea leaves (oolong is a good choice too)
  • 5, 1/2 tsp of black peppercorns (more or less to taste)
  • 20 pickling cucumbers, washed (free of bruises and soft spots)

Bring 6 cups water and all of the salt to a boil over high heat. Off heat add 6 cups water and the vinegar. Let cool to room temperature.

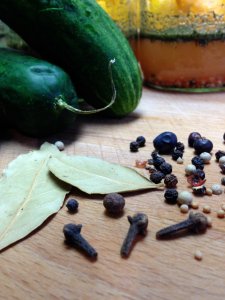
Pickling Spices

I finally settled on just a few spices but the options are nearly endless.

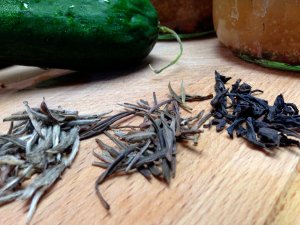
Tea for pickling

Tannins keep fermented pickles crisp. Not having access to a steady source of grape or oak leaves, I turned to tea leaves. I tried several varieties and settled on green (oolong is a good option too).

Place 2 garlic cloves, 1 diced chili pepper, 1 bay leaf, 1 teaspoon dried dill, 1/2 tsp loose green tea leaves, and 1/2 tsp black peppercorns in the bottom of each quart jar.

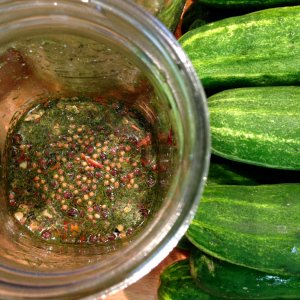
pickle spices

Load your choice of pickling spices in the bottom of the sterilized quart jars.

fermented cucumbers

Try out a variety of spices-here was a trial run with added mustard seeds.

Pack with cucumbers (usually about 4 or so fit). Cover cucumbers by about an inch and a half with brine. Save the remaining brine and place in the fridge in case jars need to be topped off during the fermentation period.

fermented pickles

Cucumbers packed into their jars and covered with brine. Here you can see different spice experiments caused different colorations in brine.

Place a parchment round on top of the cucumbers, submerged in the brine. Place a smaller jar on top of the round and cucumbers to hold the cucumbers down.

feremented pickles

A small jar weighs down cucumbers to keep them below the brine’s surface.

fermented pickles

A 4 oz canning jar fits just inside a wide-mouthed, quart canning jar to keep cucumbers below the pickling brine’s surface. It’s a great option if you don’t need a large pickling crock’s worth of pickles

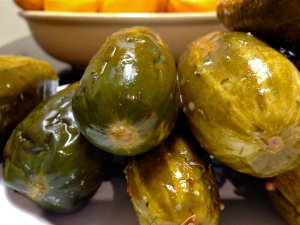
Place a square of cheesecloth over each jar and secure with kitchen twine to keep dust out. Keep your jars at room temperature and away from direct sunlight. Check daily to make sure cucumbers are covered in brine, top off if necessary, and skim any scum that might form. If the cheesecloth gets damp, replace it. The brine will get cloudy and bubbles will form, and the cucumbers will turn from the bright green of a cucumber to the darker, olive-green color of a pickle. Mine were perfect at 9 days, but taste as you go and move them to the fridge when you achieve the flavor you want (sources say the cucumbers can sit for up to 21 days at room temperature). Voila! Easy fermented pickles!

fermented pickles

Perfect fermented pickles!