Cucumber Sour Cream and Onion Chips

1
Cucumber Chips

MMMM…Potato Chips. I can’t even bring them into my house. Especially Sour Cream and Onion potato chips. Seriously-I.Have.No.Will.Power!

I’m not the only one that has a potato chip fetish, er, problem. In recent years the potato chip market generated over 16 billion in revenues per year. I don’t turn my nose up at any chip but I’m a complete and total sucker for Sour Cream and Onion potato chips. I don’t know that the chip is where it’s at when talking about Sour Cream and Onion chips. After all, I have been known to lick the powdery dusting off of them when in a glassy-eyed potato chip daze. So, in my continual search for eliminating processed and high glycemic foods in my diet, I began thinking about ways to get the same Sour Cream and Onion fix without all the muffin top-inducing effects of a traditional potato chip. I think Wilford Brimley had it right….

Cucumber potato chips

Yep. Tha ‘Beetus. Nobody wants it.

After trial and error, I think the Cucumber Sour Cream and Onion Chip is where it’s at. Cucumbers are flavor neutral enough to not get in the way of the tart flavorings and can be easily sliced thin enough to get some crisp on when placed in the dehydrator. Cooled and packed in a Ziploc with a desiccant pack, they’ll stay crisp enough to keep around for a week or so. Feel free to make double or triple the recipe…these things are seriously addictive. We can’t even wait for them to cool down before we’re going at ’em like rabid dogs. Trust me on this.

Cucumber Sour Cream and Onion Chips

  • 2 cucumbers
  • 2 TBSP Light Tasting Olive Oil
  • 2 TBSP Cultured Buttermilk Powder
  • 1 TBSP onion powder
  • 1 tsp dried dill
  • 1/2 tsp garlic powder
  • 1/2 tsp salt
  • Food processor or mandoline (get yourself a handheld one here)
  • Dehydrator with mesh inserts (allows drying of smaller or thin items)

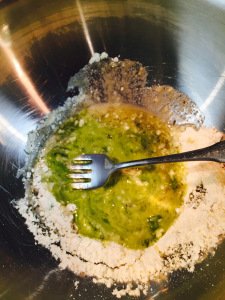
Whisk olive oil, buttermilk powder, onion powder, dill, garlic powder, and salt in a bowl.

Cucumber Chips

Mixing up the ‘chip’ flavoring. The cultured buttermilk powder really does the trick!

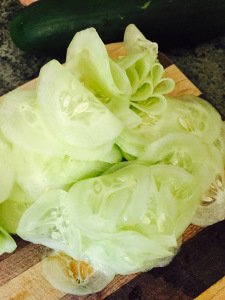
Wash and peel your cucumbers as the skin can get a little bitter when dehydrated. Slice your cucumbers at about 2-3 mm thickness.

Sour Cream and Onion Cucumber Chips

Thin slices = less time until you eat chips!

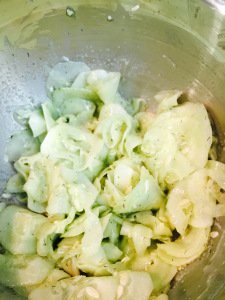
Working in small batches (about 1/2 cup), very gently toss the cucumber slices in the olive oil mixture.
Cucumber Chips

Gently coat the cucumber in the olive oil mixture. Working in small batches will help prevent the salt in the olive oil mixture from drawing out too much water from the cucumber and/or causing the cucumber to fall apart.

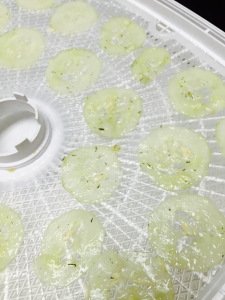
Place in single layers on dehydrator racks and dehydrate according to manufacturer settings until crisp.
Sour Cream and Onion Cucumber Chips

Ready to dehydrate. The waiting is the hardest part. Make enough for a week if your dehydrator is large enough. You’ll need them.

Mine generally take 6 or so hours at 135 degrees.
Cucumber Chips

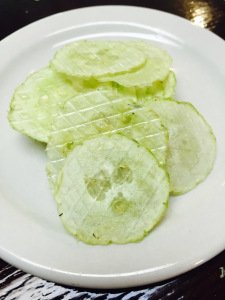
Super crisp and melt in your mouth if cut at 1mm…the crisp and body of a potato chip at 2-3mm. Either way you’re going to need a lot of these…they’re just too good to put down. Forget a standard potato chip…I’m not even looking back!

Cool completely and store in a Ziploc with a desiccant pack in the refrigerator. Next time your snack attack hits…reach for your cucumber chips and you won’t have to feel bad for a minute!

Easy Fermented Pickles

2
fermented pickles

Super crunchy, zesty fermented pickles.

After experimenting with fermenting cabbage and producing a delicious sauerkraut, I turned my sights to fermented pickles. I can remember my Dad fermenting pickles from the garden in a huge Blue Crown crock. The fermented pickles always tasted so much better than heat-processed, canned pickles. The flavor of the spices stood out, the sourness was superior to that produced by vinegar alone, and they stayed crunchy. I read post after post and tried recipe after recipe and settled on something that combined the best of all of them. They really did turn out superbly-a little spicy, a little garlicky, and a whole lotta crunchy. No limp, squeaky, bland pickles here! Best news, unlike other ferments that take a month or two, this one took only 9 days to produce a fantastic pickle!

fermented pickles

Spicy, garlicky, and crunchy!

Fermented Pickles

  • 5 wide-mouthed quart jars, sterilized
  • 5 smaller jars (I use 4 ounce) jars, sterilized
  • Sterilized tongs
  • 5 rounds of parchment paper, cut to fit just inside of quart jars
  • 5 sections of cheesecloth and 5 lengths of twine to cover jars
  • 12 cups of filtered water
  • 1/2 cup plus 2 TBSP Kosher salt
  • 1/4 cup distilled white vinegar
  • 10 cloves garlic, peeled and smashed
  • 5 red chili peppers, diced
  • 5 bay leaves
  • 5 teaspoons dried dill
  • 5, 1/2 tsp loose green tea leaves (oolong is a good choice too)
  • 5, 1/2 tsp of black peppercorns (more or less to taste)
  • 20 pickling cucumbers, washed (free of bruises and soft spots)

Bring 6 cups water and all of the salt to a boil over high heat. Off heat add 6 cups water and the vinegar. Let cool to room temperature.

Pickling Spices

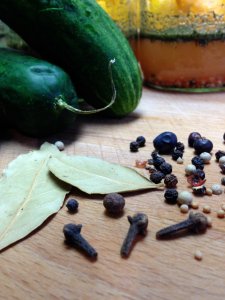
I finally settled on just a few spices but the options are nearly endless.

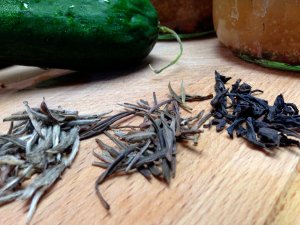
Tea for pickling

Tannins keep fermented pickles crisp. Not having access to a steady source of grape or oak leaves, I turned to tea leaves. I tried several varieties and settled on green (oolong is a good option too).

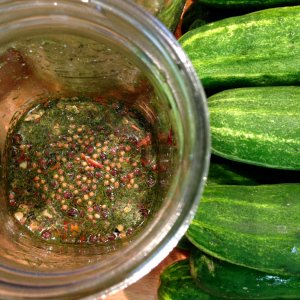
Place 2 garlic cloves, 1 diced chili pepper, 1 bay leaf, 1 teaspoon dried dill, 1/2 tsp loose green tea leaves, and 1/2 tsp black peppercorns in the bottom of each quart jar.

pickle spices

Load your choice of pickling spices in the bottom of the sterilized quart jars.

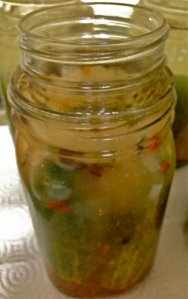
fermented cucumbers

Try out a variety of spices-here was a trial run with added mustard seeds.

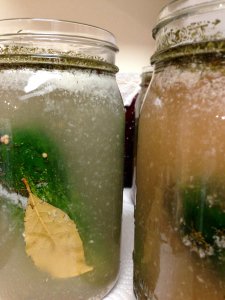
Pack with cucumbers (usually about 4 or so fit). Cover cucumbers by about an inch and a half with brine. Save the remaining brine and place in the fridge in case jars need to be topped off during the fermentation period.

fermented pickles

Cucumbers packed into their jars and covered with brine. Here you can see different spice experiments caused different colorations in brine.

Place a parchment round on top of the cucumbers, submerged in the brine. Place a smaller jar on top of the round and cucumbers to hold the cucumbers down.

feremented pickles

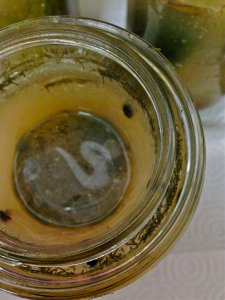
A small jar weighs down cucumbers to keep them below the brine’s surface.

fermented pickles

A 4 oz canning jar fits just inside a wide-mouthed, quart canning jar to keep cucumbers below the pickling brine’s surface. It’s a great option if you don’t need a large pickling crock’s worth of pickles

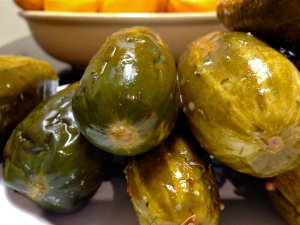
Place a square of cheesecloth over each jar and secure with kitchen twine to keep dust out. Keep your jars at room temperature and away from direct sunlight. Check daily to make sure cucumbers are covered in brine, top off if necessary, and skim any scum that might form. If the cheesecloth gets damp, replace it. The brine will get cloudy and bubbles will form, and the cucumbers will turn from the bright green of a cucumber to the darker, olive-green color of a pickle. Mine were perfect at 9 days, but taste as you go and move them to the fridge when you achieve the flavor you want (sources say the cucumbers can sit for up to 21 days at room temperature). Voila! Easy fermented pickles!

fermented pickles

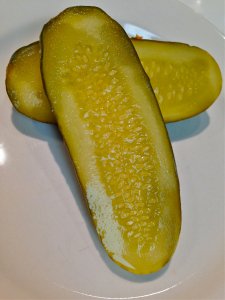
Perfect fermented pickles!