Shanghai Red Cooked Pork Belly

2

I first fell in love with Chinese red cooking when I adapted a red cooked beef finger recipe. It was truly addicting. So much so that I ran, nay sprinted, many blocks, in flood water rains to procure the necessary items to make steamed bao buns. During the treacherous drive home, my mind had a stroke of genius…if red cooking made beef that tasted like a magical gift from the heavens, what would it do for my dear and longtime friend, Mr. Pork Belly. If the fatty beef fingers were delectable in the deeply satisfying red-cooked sauce, I knew beyond a shadow of a doubt that Mr. Pork Belly would be absolutely divine. So, I sprinted again, through monsoon rains to our local Asian market for a couple of pounds of pork belly…and a cup of hot tea, a bowl of beef Pho, and a cruise around the store to pick up $100 bucks or so of stuff I absolutely needed (quail eggs, new chopsticks, wuyi oolong tea, sake, rice seasoning, etc.).

Like the beef recipe, most pork belly recipes called for blanching the meat prior to braising. Like the recipe for Chinese Red-cooked Beef, I opted to sear the meat to add to the depth of the final dish. I also wanted a bit of the ‘bark’ or crispier edges that searing provides. Again, bao buns were on my mind. Soft pillowy clouds wrapped around crispy, sticky, sweet and salty pork nuggets, all laced with spicy Kimchi. Yes. Please.

The ingredients are identical to my Chinese Red-cooked Beef recipe, but pork belly brings a whole new level of business to the game. Add Kimchi and you are all up in it. All I can say is ‘no leftovers’. What? Yep. No leftovers. I shouldn’t admit it, but we (proudly) took down 2, count them, 2 pounds of pork belly. It took a whole day, but we indeed did it (and made sure a hefty workout was on the books for the next day!). This stuff is like meat candy. You’re gonna want to get on this. Pronto.

Shanghai Pork Belly

  • 2 pounds of pork belly, skin on, in 1.5 to 2 inch cubes
  • 1/2 cup sugar
  • 1/4 cup water
  • 1 and 1/2 cups dry sherry
  • 1/2 cup low sodium soy sauce or liquid aminos
  • 1 tsp white pepper
  • 1/2 tsp dried orange peel (you can substitute fresh zest if necessary)
  • 3 whole star anise
  • 1/2 tsp cinnamon
  • 2 red chilies, diced (or 1/4 tsp crushed red pepper flakes)
  • 2 tsp grated ginger
  • 1 garlic clove
  • 1.5 cups water or pork or vegetable broth (no or low sodium); as much as needed for appropriate liquid level

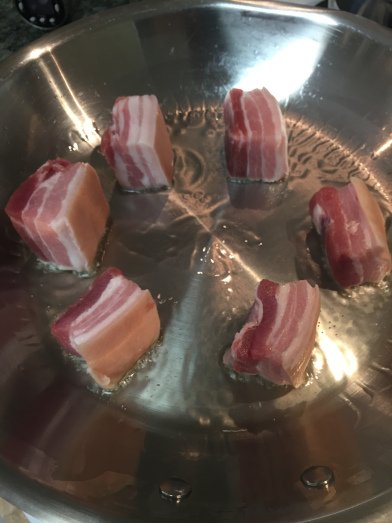
Caramelize your sugar and make the Sherry-sugar sauce just like in the Chinese Red-cooked Beef recipe. Next, brown those little nuggets of goodness, or pork belly cubes if you prefer to call them that (*frowns*). Remember, dry your pork nuggets thoroughly, make sure your oil is well heated, allow plenty of room between the nuggets, and allow the pan to come back to temp between batches. Remove the nuggets and set aside on a plate.
IMG_2270

Remember to dry the pork thoroughly, heat your oil well, and leave enough room between pieces so they don’t steam instead of sear.
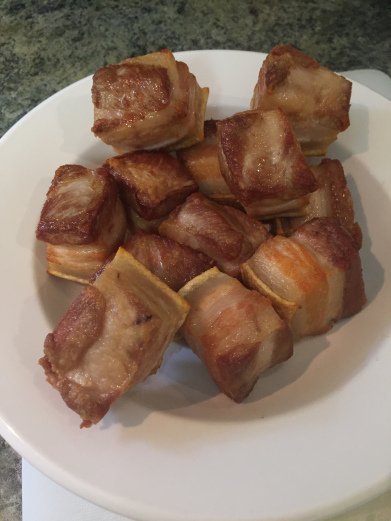
IMG_2275 2

Golden pork nuggets!

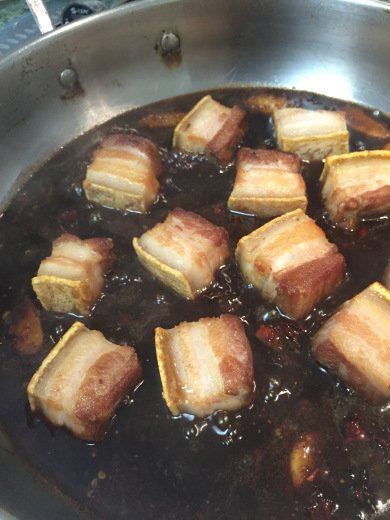
Drain most of the fat from pan. I know, I know. I usually display exaggerated disapproving facial expressions at those committing the crime of ‘fat draining’, but sometimes there are exceptions. More fat will render during cooking and all will be well. Trust me. Now, reduce your heat to medium-low, add your dry spices to the pan, and heat them for about 1 minute. This allows the oils in the warmer spices to bloom. Add your red pepper flakes here if you’re not using fresh chilies. Next, add the soy sauce or liquid aminos. Add the ginger, garlic, and peppers. Deglaze the pan by scraping the bottom with the edge of a wooden spoon. Once all the good bits are worked free from the bottom of the pan add the sugar-sherry mixture. Return your pork nuggets to the pan, placing them in evenly in one layer.
IMG_2276

Check out the beautiful mahogany-colored sauce. The scent of star anise, orange, cinnamon, and ginger will fill the house. Commence drooling.

The sugar-sherry liquid level should come up to about 1/2 the level of the top of the meat (we want to braise the meat, not stew it). Add water, pork stock, or chicken stock if needed to achieve the appropriate liquid level. If you add stock, be sure it is no- or low-sodium as there is plenty of salt to be had otherwise. Bring the pork and liquid mixture to a simmer, place the lid, and tuck it away in your preheated oven. Cook until the meat is fork tender and the fat and connective tissue is dissolved, about 2-3 hours.

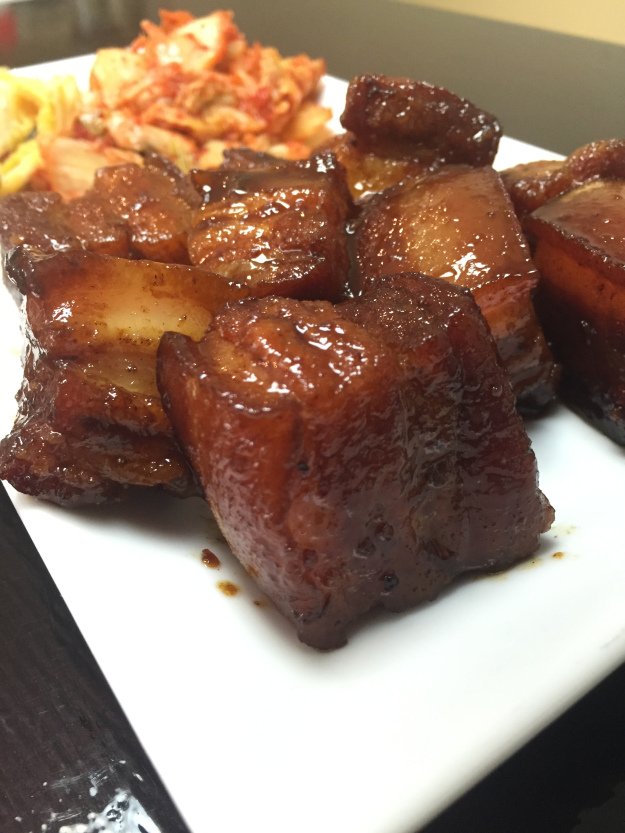
Remove the pork from the pan to a plate. Try really hard not to eat it right away. You will need to exercise extreme discipline at this point or perhaps try physical restraint. I am not ashamed to admit I failed (and earned a blister on the roof of my mouth to prove it!). Remove your star anise from the pan liquid and boil the sauce until it is glossy and reduced to about a cup.
IMG_2280

Look. At. That.

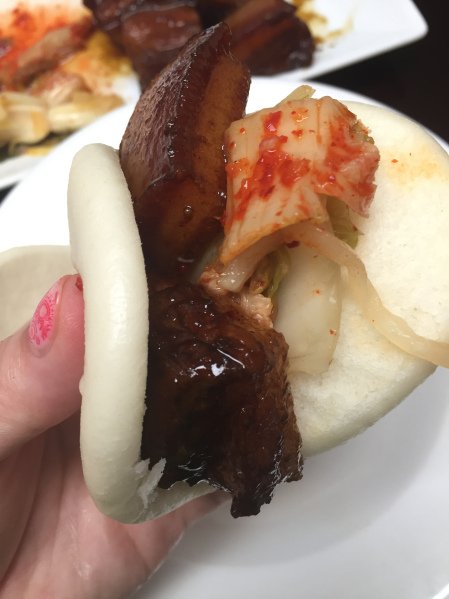
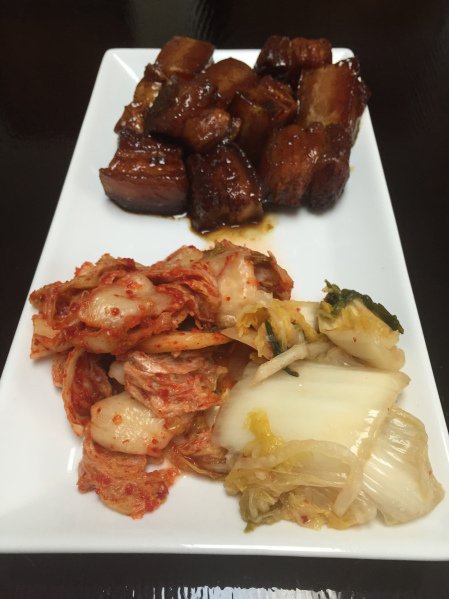
Serve meat, drizzled with sauce, over rice or with your favorite steamed or sauteed vegetable. My preference is sticky, salty, sweet pork nuggets tucked into airy Bao Buns, nestled alongside spicy and sour Kimchi, and paired with lightly wilted bok choy. None better. Broccoli, broccoli rabe, bok choy, kale, or spinach pair well too. Enjoy!
IMG_2279

Kimchi is the perfect partner.

IMG_2282

Eat it up. Shanghai pork and kimchi ride along perfectly in little puffy bao buns.


Tea and Molasses-Brined, Pecan-Smoked Pork with Peach Salsa

1
IMG_8451

Too good! Tea and molasses brined, pecan smoked, Boston Butt with peach salsa. You never had it so good!

Whew! That’s a mouthful! I really can’t shove any more Southern things in one recipe. Tea, Molasses, Pecan, Pork, and Peaches. Seriously….love! Love! Love! Now, some of you may think this is a big ol’ pain in the rear…brining overnight, long hours on the smoker. Well, first, it’s totally worth it. Just trust me on this one. And second, almost nothing makes me happier than tending a smoker all day (I’m so jealous of my buddy at work, Brad’s, awesome smoking ability that I have to practice, practice, practice!). It’s a great excuse to kick back, have an adult bev-er-aghe, and relax. Listen to the birds, hang out with Charlie-dog. Watch the grass grow. Whatever floats your boat. Now, some say smoking meat is an art. And I guess the fact that every BBQer has their own process and recipe for brines and rubs does make it a bit of an art. But there’s also a science to it. For this beauty, ya gotta go low and slow until the fat and connective tissue break down and move the meat from a dense, tough wad into a loose, tender delight!

Now, supplies. You need a non-reactive container large enough to hold the meat and brine. You need a smoker. Now, if you don’t have a smoker, you can still brine this beast and let it roll in a 225 degree oven. You won’t be sorry. I digress back to smokers…I use an electric one. Yes, gasp, electric. It’s what I started with when I had no experience, and frankly, I kept it out of being partly comfortable with it and partly lazy. The idea of tending coals to keep an even temperature completely ruins my put the meat on and ‘watch the grass grow’ philosophy. Last thing, you need wood chips (unless you’re doing the oven thing). I used pecan, but apple or cherry would work great too. Just no big, heavy ones like hickory or mesquite.

Now go get yourself a 5 pound pork Boston Butt and a 6-pack of Woodchuck Cider and come on back….

For Brine (heat all components together and let cool completely, or take my lazy way and mix together until dissolved):

  • 2.5 quarts water
  • 8 ounces molasses
  • 8 ounces Kosher or Pickling Salt
  • 4 bay leaves
  • 3 TBSP black tea leaves
  • 1 TBSP dry rosemary
  • 1 TBSP black pepper

For Rub (process in food processor until you reach sugar-nut-spice dust):

  • 1 TBSP flavor-neutral oil for coating meat first (gives rub something to stick to)
  • 2/3 cup brown sugar
  • 2/3 cup pecans
  • 1 TBSP dry rosemary
  • 1 bay leaf
  • 1 tsp black peppercorns
  • 1 tsp salt

For Peach Salsa

  • 4 peaches, slightly unripe
  • 1/2 jalapeno, cored and deseeded, chopped fine
  • 1 TBSP finely chopped red onion
  • 2 tsp brown sugar
  • 2 tsp apple cider vinegar
  • Salt and pepper to taste

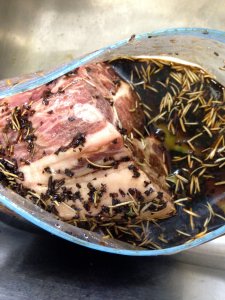
Rinse your Butt (ahhhh….I couldn’t help it!). Place brine in large enough container to hold brine with meat submerged…a gallon Ziplock does the trick. Let ‘marinate’ and sit overnight, in the fridge, or at least a few hours.

IMG_8416

Pork’s in the brine!

Fire up your smoker according to your smoker type and wood chip preference-pecan chips were used here and 2 Woodchuck Ciders were used as the liquid to keep things from drying out.

IMG_8428

Get your smoker rollin’ before you’re ready to put the meat on…I find that keeps a bitter taste from forming with the first massive smoke production.

After brining, remove pork, discard brine, and rinse well to remove some salt. Pat dry with paper towels (or kitchen towels if you want your Hubbs to give you scornful looks!).

IMG_8419

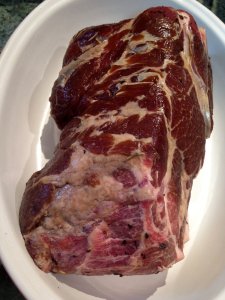
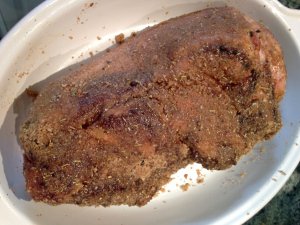
Porky-pork is ready to go…you can see here how the brined portion is a bit darker that the close end that was sticking a bit above the brine solution.

Coat pork in oil lightly. Cover all visible porky goodness in the rub.

IMG_8420

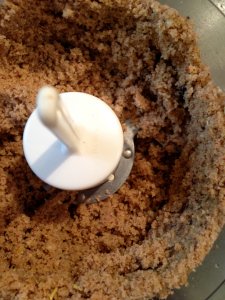
Brown sugar, pecan, herb dust. Or rub. Whatevs.

IMG_8422

Lump-o’-meat covered in rub. Yeah, I got nothin’ witty about that!

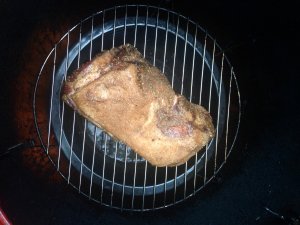
Place your Pork-Masterpiece-In-Progress, Lunp-O-Meat close to the braising liquid (closest rack) and close up your smoker.

IMG_8429

Pork is positioned and ready to go…commence to watching the grass grow!

Feel free to indulge in your excess Woodchuck as things are brewing. On further introspection, you may have needed a 12-pack. After 2 hours, lift the lid and quickly dampen the meat with its drippings. Get back to your Woodchuck. In another hour, repeat. Repeat again in an hour (we’re up to four hours for those who have spent too much time with chain saws or too much time ‘catfish noodling’ and are missing the appropriate number of counting appendages). Now, your pork should be sitting at about 160 degrees. It will stall there and make you depressed that you will never get to eat that porky goodness. Don’t distress. We’re gonna fix that with a ‘crutch’.

IMG_8433

‘The Crutch’. This helps the meat reach the appropriate temperature to break down all the fat and connective tissue to produce a super-tender, juicy HUNK-O-MEAT! Oh…excuse me…I lost control of my senses for a minute there….

Remove the meat from your smoker and quickly wrap it in two layers of foil with a bit of liquid in the bottom. Seal super tightly. Put it back in the smoker and go, go, go until the internal temp reaches 190-200 degrees. ONLY THEN, remove your Early Christmas Present from the smoker and let it rest for about 30 minutes or so before shredding.

IMG_8446

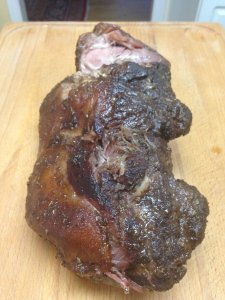
Oh…My…Goodness. I’m not gonna lie…I debated clutching this thing like a lost pup and running into the wilderness just to prevent The Hubbs from having some. That. Good. You can see where we got all sortsa impatient and nibbled off of it before it’s photo shoot.

You can place the wrapped lump in a cooler for up to 4 hours and it will stay warm (as if you’re gonna be done before any guests arrive).

IMG_8441

Awww…aren’t those pretty peaches. Cut ’em up people! It’s salsa time!

IMG_8444

Peach salsa Yo!

Now, for the peach salsa. Just mix up your diced peaches, onion, and jalapeno. Add your brown sugar, apple cider vinegar, salt, and pepper. Taaa-daa! Done!

IMG_8451

Now that’s dinner!

Serve pork with salsa and creamy grits, salad, or side of choice. Certainly creamy grits are my favorite choice!

If your will is made of steel, save some pork for chile rellanos or awesome omelettes!

Easy Chile Verde….or just Damn Good Pork

0
IMG_7818

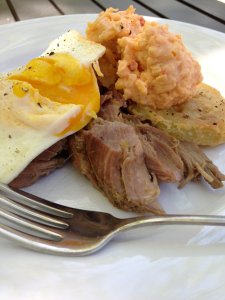
Chili verde with jalapeno pimento cheese (Palmetto Cheese brand), fried egg, and a fried green tomato!

My love affair with pork…it’s a long-standing one. Frankly, it’s in my blood being a Southerner and all. I like it all…bacon (bacon!!!!), pork loin, smoked pork, pulled pork, cracklins’…you name it, I love it. Chili verde, simply braised pork chunks in a green chili and/or tomatillo sauce, is some seriously good pork eats. I frankly have never had a bad chili verde. It really goes well with ev-e-ry-thing. Slap some on a fried egg or fried green tomato or make yourself a little taco salad with a chipolte dressing. Roll that goodness up in a burrito (or lettuce or kale wrap) or throw it in some soup (white bean chili!). It pairs super well with jalapeno pimento cheese (what the hell doesn’t???). Or my favorite….straight off the fork! Good news is this recipe is super easy and can bypass any slicing and dicing. It even cooks while you sleep! My kinda business. Now you know where the ‘slap it on a fried egg’ comes in…waking up to a house full of porky goodness begs one to immediately fry up an up an egg and go to town while standing over the kitchen counter in your housedress. Yep, it’s that good. Here goes…

Easy Chili Verde

  • 5 lb Boston Butt (do not remove fat pad)
  • 1 jar green salsa (as spicy as you like it)
  • 2 cups Mojo Crillo marinade (get the ‘crillo’ since it has no MSG)
  • crock pot

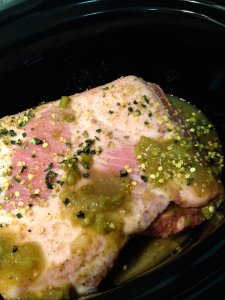
Rinse pork. Throw it in the crock pot fat side up (for Pete’s sake, don’t cut the fat off!!). Toss in the whole jar of green salsa and 2 cups of Mojo Crillo.

IMG_7814

Dressing up the pork!

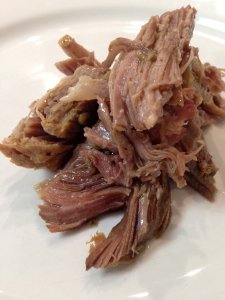
Put the lid on your crock pot and set it on low and let it simmer away overnight. I usually set mine on low for 10 hours and it’s perfect. You can get all fancy and add sliced peppers and onions in the beginning-they’ll add flavor, but will completely break down. Not to worry. Shove the juices (after cooking) and peppers/onions through a fine sieve and you have yourself a serious sauce. Plunk the pulled pork/pork chunks back down in that sauce and you’re in business! If you want to keep the peppers and onions intact, you’ll have to wait and add them a few hours from the end.

IMG_7820

Too delicious!

Now go forth and slather your porky goodness over whatever you can think of—you won’t be disappointed.