I first fell in love with Chinese red cooking when I adapted a red cooked beef finger recipe. It was truly addicting. So much so that I ran, nay sprinted, many blocks, in flood water rains to procure the necessary items to make steamed bao buns. During the treacherous drive home, my mind had a stroke of genius…if red cooking made beef that tasted like a magical gift from the heavens, what would it do for my dear and longtime friend, Mr. Pork Belly. If the fatty beef fingers were delectable in the deeply satisfying red-cooked sauce, I knew beyond a shadow of a doubt that Mr. Pork Belly would be absolutely divine. So, I sprinted again, through monsoon rains to our local Asian market for a couple of pounds of pork belly…and a cup of hot tea, a bowl of beef Pho, and a cruise around the store to pick up $100 bucks or so of stuff I absolutely needed (quail eggs, new chopsticks, wuyi oolong tea, sake, rice seasoning, etc.).
Like the beef recipe, most pork belly recipes called for blanching the meat prior to braising. Like the recipe for Chinese Red-cooked Beef, I opted to sear the meat to add to the depth of the final dish. I also wanted a bit of the ‘bark’ or crispier edges that searing provides. Again, bao buns were on my mind. Soft pillowy clouds wrapped around crispy, sticky, sweet and salty pork nuggets, all laced with spicy Kimchi. Yes. Please.
The ingredients are identical to my Chinese Red-cooked Beef recipe, but pork belly brings a whole new level of business to the game. Add Kimchi and you are all up in it. All I can say is ‘no leftovers’. What? Yep. No leftovers. I shouldn’t admit it, but we (proudly) took down 2, count them, 2 pounds of pork belly. It took a whole day, but we indeed did it (and made sure a hefty workout was on the books for the next day!). This stuff is like meat candy. You’re gonna want to get on this. Pronto.
Shanghai Pork Belly
- 2 pounds of pork belly, skin on, in 1.5 to 2 inch cubes
- 1/2 cup sugar
- 1/4 cup water
- 1 and 1/2 cups dry sherry
- 1/2 cup low sodium soy sauce or liquid aminos
- 1 tsp white pepper
- 1/2 tsp dried orange peel (you can substitute fresh zest if necessary)
- 3 whole star anise
- 1/2 tsp cinnamon
- 2 red chilies, diced (or 1/4 tsp crushed red pepper flakes)
- 2 tsp grated ginger
- 1 garlic clove
- 1.5 cups water or pork or vegetable broth (no or low sodium); as much as needed for appropriate liquid level
Caramelize your sugar and make the Sherry-sugar sauce just like in the Chinese Red-cooked Beef recipe. Next, brown those little nuggets of goodness, or pork belly cubes if you prefer to call them that (*frowns*). Remember, dry your pork nuggets thoroughly, make sure your oil is well heated, allow plenty of room between the nuggets, and allow the pan to come back to temp between batches. Remove the nuggets and set aside on a plate.
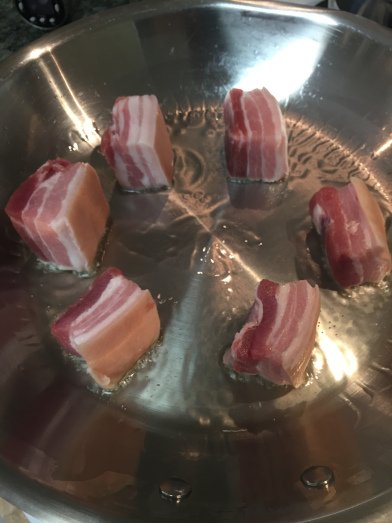
Remember to dry the pork thoroughly, heat your oil well, and leave enough room between pieces so they don’t steam instead of sear.
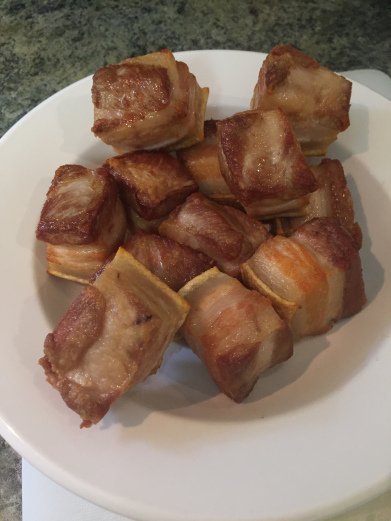
Golden pork nuggets!
Drain most of the fat from pan. I know, I know. I usually display exaggerated disapproving facial expressions at those committing the crime of ‘fat draining’, but sometimes there are exceptions. More fat will render during cooking and all will be well. Trust me. Now, reduce your heat to medium-low, add your dry spices to the pan, and heat them for about 1 minute. This allows the oils in the warmer spices to bloom. Add your red pepper flakes here if you’re not using fresh chilies. Next, add the soy sauce or liquid aminos. Add the ginger, garlic, and peppers. Deglaze the pan by scraping the bottom with the edge of a wooden spoon. Once all the good bits are worked free from the bottom of the pan add the sugar-sherry mixture. Return your pork nuggets to the pan, placing them in evenly in one layer.
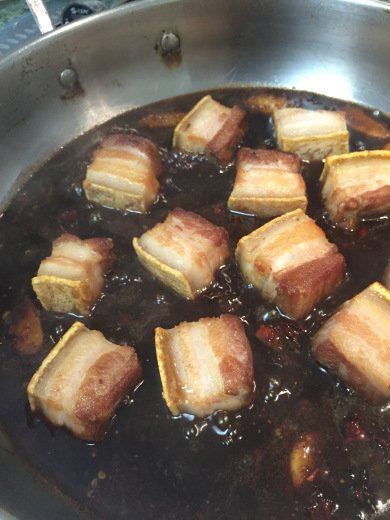
Check out the beautiful mahogany-colored sauce. The scent of star anise, orange, cinnamon, and ginger will fill the house. Commence drooling.
The sugar-sherry liquid level should come up to about 1/2 the level of the top of the meat (we want to braise the meat, not stew it). Add water, pork stock, or chicken stock if needed to achieve the appropriate liquid level. If you add stock, be sure it is no- or low-sodium as there is plenty of salt to be had otherwise. Bring the pork and liquid mixture to a simmer, place the lid, and tuck it away in your preheated oven. Cook until the meat is fork tender and the fat and connective tissue is dissolved, about 2-3 hours.
Remove the pork from the pan to a plate. Try really hard not to eat it right away. You will need to exercise extreme discipline at this point or perhaps try physical restraint. I am not ashamed to admit I failed (and earned a blister on the roof of my mouth to prove it!). Remove your star anise from the pan liquid and boil the sauce until it is glossy and reduced to about a cup.
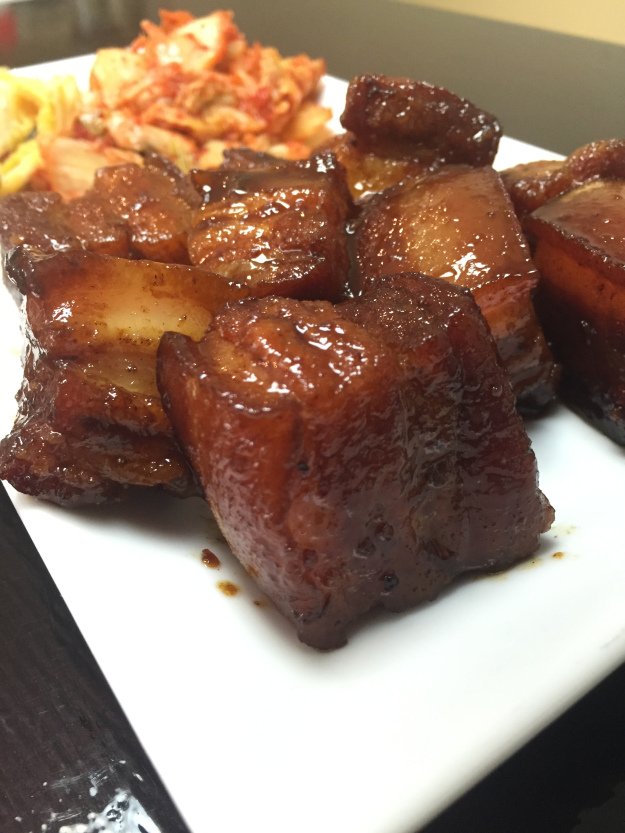
Look. At. That.
Serve meat, drizzled with sauce, over rice or with your favorite steamed or sauteed vegetable. My preference is sticky, salty, sweet pork nuggets tucked into airy Bao Buns, nestled alongside spicy and sour Kimchi, and paired with lightly wilted bok choy. None better. Broccoli, broccoli rabe, bok choy, kale, or spinach pair well too. Enjoy!
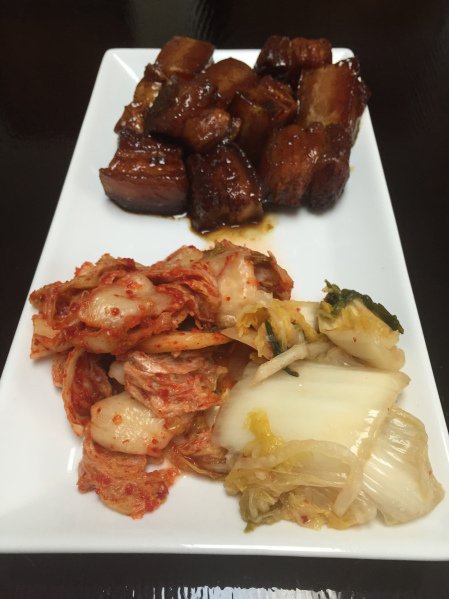
Kimchi is the perfect partner.
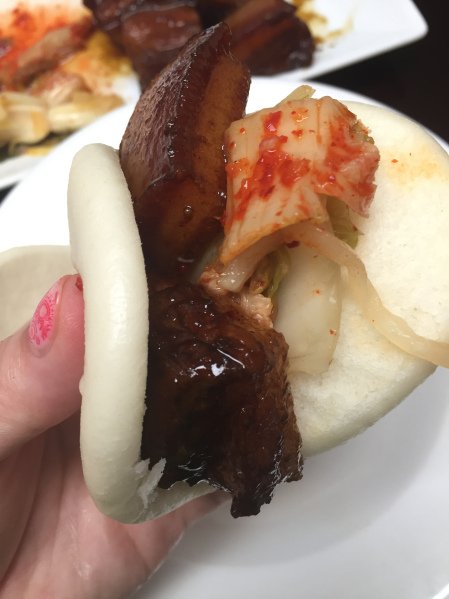
Eat it up. Shanghai pork and kimchi ride along perfectly in little puffy bao buns.