For some time I wondered what those precious little sprigs of greenery were perched atop my dishes when I was out and about eating. Some looked like pea shoots, others like clover, some purple, others red-tinged. And the flavor from each was distinct and super-concentrated. I was quite intrigued. Then, during a foray into sprouting, I discovered the microgreen. What exactly is a microgreen you ask? Technically it is a tiny green used for visual and flavor in dishes. Being intrigued, I set out to see how these little buggers were ‘made’. After much interweb digging, I ordered myself a hydroponic kit and set to work. Well, that was a failure. The trays were too big for one or two people to get through before they dried out (or grew mold). And I just couldn’t feel good about throwing out the growing mat after each ‘crop’. Bearing my Grandaddy’s predilection for liking to grow little things in little containers and a strong inkling not to be deterred, I tried the same trays with organic soil. Equal failure. Mold, rot, and dry soil. How was this so when they made it look so simple all over the interwebs? Then I stumbled onto the perfect solution. The humble grocery store lettuce container (I also like to blame this re-purposing phenomena on Grandaddy since his yard was full of blue Folgers coffee cans sprouting various experimental plants). You know the ones that your organic arugula, super greens, and baby kale come in? Yep. Those ones. That simple.
This is super easy, great for small places, and requires very little monetary input-dirt, seeds, and reusable container. And don’t worry, that 1/4 pound baggie of seeds may be $12 but it lasts a great, long while. Best yet, they add so much flavor to my daily salad that my dressing has simply become a drizzle of oils (any combination of olive, avocado, macadamia, walnut, almond, hazelnut, pumpkin seed, or herb-infused oils). Other than imagining I’m tearing through a Fairy Forest like Godzilla, these things are fantastic! So, over-active imagination aside, microgreen growing is every bit fantastic!
I start a new container every other day or so and that keeps me in mounds of microgreens for my daily lunch salad. There’s a certain satisfaction about watching them grow—a little, simple success in getting the seed to hatch and unfurl. And I can’t help but think of my friend Holly who is quite ingenious in growing herbs in small spaces-this adds a whole new landscape to small space and indoor gardening.
- Re-purposed lettuce containers, as many as you’d like
- 3 or so inches of organic soil per container
- Seeds (try Johnny’s Seeds for great variety)
- Fine mist spray bottle
- Filtered water (or not, I really can’t tell a difference!)
First things first, the websites and videos will tell you to titer your water to a pH of 6. They’ll tell you this essential. Lies! Forever I spent bent over like a mad scientist titrating my filtered water. Then it hit me. Mother Nature doesn’t titrate water pH. And frankly, that step turned this simple, natural act into a pro-duc-tion. And I’m kinda lazy when it comes to that sort of thing. They also said to soak certain seeds. Yep. Not doing that either. I mean, you’re not creating DaVinci-style microgreens for restaurants. They’re for you…to eat. In my experience, it just didn’t make a difference. So I’m not durrin’ it!
I digress. Get yourself a some old lettuce, tomato, or mushroom containers.
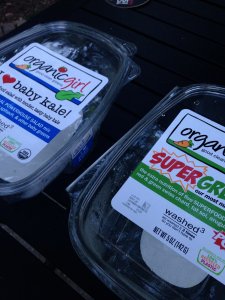
Re-purposed containers. The ones with hinged lids work great—no losing the lid! For those wanting to try seed varieties, use the tiny tomato packages with hinged lids and get sample packs of seeds.
And some little packs of seeds. Definitely try Johnny’s Seeds for variety.
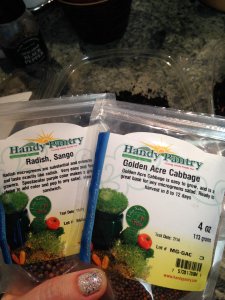
Get yourself some seed packs…I’ve even used packs of radish seeds from last season. Great way to use up the supply of seeds for that monstrous garden I never got around to planting!
Put a 3 or so inch layer of soil in your container. Even it out with the back of a spoon.
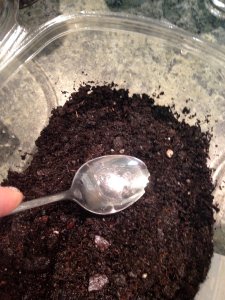
Place your soil and get it fairly even. No need to be perfect here, people. Just no big divots where seeds will settle en masse.
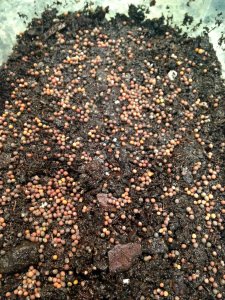
Dampen the soil with water. Sprinkle your seeds in an even layer on top and press them gently into the soil.
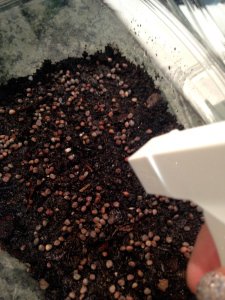
Spray the seeds and top/lid of container to moisten. If you’re using an old styrofoam mushroom container, find a lid like a washed styrofoam meat tray, and use it as the top. The seeds need a few days of relative darkness to sprout (remember, don’t get too freaky about total darkness, as Mother Nature does shine a little sun on the buggers when in a natural setting).
Place your dampened lid, and cover with a densely-woven kitchen or hand towel. This is to mimic the darker conditions the seeds experience in nature when you cover them with soil.
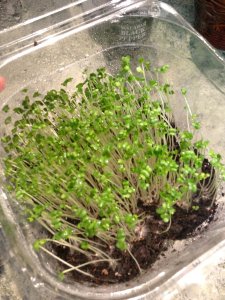
And…now wait. Depending on the seed, it takes about 3 or so days to get sprouting and a bit of height. You’ll want to mist the inside of the lid daily or so to keep a bit of moisture in your container. When you get the first set of leaves and they are about 3 inches, take the lid off and let some sunlight in.
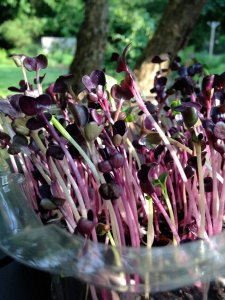
In another 2 days or so, I start mowing them down with some scissors near the soil line. For sunlight, I place mine on a shelf near a window in the laundry room. You can experiment with letting them grow a bit longer to where they get their first set of ‘true leaves’, but I can be as impatient as I am lazy. So, eat ’em when you’re ready.
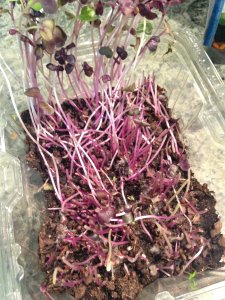
Half-mowed microgreens. Just cut near the soil line. Be careful not to bring the dirt with you. Or hey, your immune system might thank you for ingesting a wee bit of organic dirt!
If you don’t use them up quickly and the soil starts to dry out, tilt the container and water near the edges, letting the water flow towards the center of the soil. You don’t want them soaked, but drying out will kill them in a skinny minute. Watering ‘overhead’ can induce mold and rot, so avoid that method.
These buggers are great on salad, in sandwiches, or as garnishes on cold or warm dishes. The possibilities are endless! Bonus? You get the daily magic of creating food out of wee tiny seeds without having to go total Farmer Joe. And for you parents…can you say ‘summer project’? Let those little kiddos learn about how their food grows AND let them tend some tasty treats for you. You’re welcome!
Play with how long you let them grow, what types of seeds you use, and how often you start a new batch to find what suits your needs. You won’t be sorry!

Pingback: Flank Steak with Chimmichurri | Charlie Eats
Pingback: Growing Microgreens at Home-Update | Charlie Eats
Pingback: Weeknight Chicken Thigh Piccata | Charlie Eats
Pingback: Growing Big, Fat Mung Bean Sprouts | Charlie Eats