Okay. This topic might sound a bit simple, or unnecessary. BUT I’ve found lots of folks who don’t know how or why you should blanch greens. If you’re no stranger to greens, you know they can be bitter and pungent. Blanching often reduces this bitterness. Don’t believe me? Peel some outer leaves off of brussel sprouts, blanch quickly, shock in ice, and serve with a citrus vinaigrette. You’ve just made a sweet, tasty salad out of one of the most despised vegetables. No bitterness or funk to be found. Blanching can also reduce cooking times. Thinking about adding greens to a pasta dish? It’ll be faster, and tastier if they’re blanched. Blanching also lets you add greens to other dishes-like a quiche. If you didn’t blanch them and squeeze out the liquid first you’d have egg, greens, and cheese soup! If none of this convinces you of the merits of blanching…let’s go with ‘it just makes the colors so darn pretty’.
Now that we’ve learned the merits of blanching, don’t stop at greens. Blanching other vegetables can work in your favor too. Blanched green beans turn out sweet but still crunchy and are perfect for a Salad Nicoise (or a snack!). Blanch a tomato to help the skin slip off. Blanch tiny baby carrots to make them even sweeter while retaining some firmness. Or blanch fresh corn or field peas prior to freezing in order to retain freshness (it kills natural bacteria on the skin that can produce off tastes later).
- Prepare an ice bath by filling a bowl with both ice and water. Nest your sieve or colander down in the bowl and set it aside (the nesting makes it easier to strain away the water).
- Fill a large pot with salted water and bring to a boil. As Chef Thomas Keller states, “It should taste like sea water in the summer”.
- Working in small batches, gently place your greens (or other veggies) in the boiling water. Be careful to maintain a boil throughout. The idea is to cook the veggies as quickly as possible. Small batches and a high salt content help keep the water boiling so the veggies cook as quickly as possible.
- Watch for the color to ‘pop’. Don’t worry, you’ll see it. The veggies will get much brighter. Now, if you’re still wanting a crunch to them, pull them out with a slotted spoon or skimmer. If you’d like, you can cook them until your preferred firmness. If you like a super squishy vegetable (I hope not!), there are probably better methods of cooking them so there’s more flavor. Too long in the pot and you’re just boiling the veggies. They will look sad and depressing and taste like, well, water. We all know from our school cafeteria days what a boiled veggie looks like! No. Thank. You.
- Plunge them into the ice bath and cool completely to stop the cooking. You can season and eat as is or you can saute, roast, or add them to other preparations. Go wild!
Next time you’re cooking up some fresh veggies, give blanching a go. You might just find you like those brussel sprouts after all!
Check out these unblanched greens…
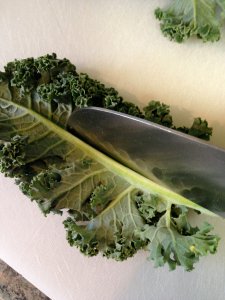
Unblanched kale. Lovely, but a little dull.
Now, check out the same kale after blanching…
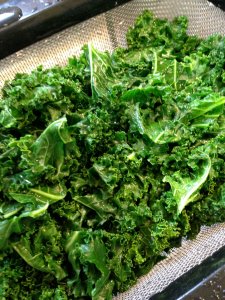
Gorgeous! And super tasty…no bitterness to be found!

Pingback: This Ain’t Your Gran’ Momma’s Kale | Charlie Eats
Pingback: Noodle-less Lasagna | Charlie Eats
Pingback: DIY Black Limes (and why you need them!) | Charlie Eats
Pingback: Charlie Eats
Pingback: Who needs Crackers and Chips…I’ve got Cabbage! | Charlie Eats